Tutorial 3
Tutorial 3's content was about adding a navmesh to my existing terrain with the windmill so AI can navigate the terrain and buildings with the aim to make them chase the player.
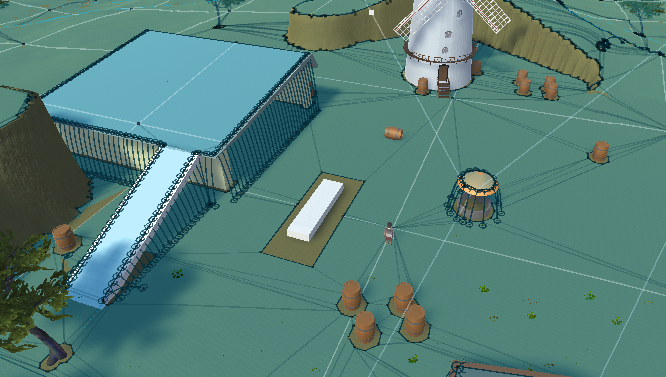
Adding a navmesh adds an area highlighted in blue which shows the area an AI can move in and also off mesh links which are the lines seen on the garage on the left which connect a circle to another circle. These circles are the positions the AI can jump/fall from, allowing the AI to traverse an area and follow the player even if they are jumping off buildings. Moving objects can also affect the navmesh and force the AI to navigate around it although this can make the game lag if there are too many objects affected the navmesh. I added a big rectangle and made it move in a triangle which the AI had to navigate around. As you can see in the above picture, there is an area around the rectangle that isn't blue and as the rectangle moves, that area moves with it.
I added the character I made for Tutorial 2 as the AI character which would chase the player who is a barrel. The AI are spawned by clicking somewhere in the game which will spawn an AI character. This was done using ray casting which basically shoots a laser from the camera the player is looking through to the position that was clicked and then spawning the AI there.
I also gave the AI an ability to predict where the player is going depending on the player's speed so when the player is moving, the AI moves to a position ahead of the player. This allows the AI to intercept the player as the AI will arrive at the player's destination at the same time rather than always being behind the player if they weren't able to.
Leave a comment
Log in with itch.io to leave a comment.